
Archive for the ‘software deployment’ Category
Feel free to discuss and contribute to this article over at the corresponding GitHub repo.
Many people suggest that you should use version control as part of your scientifc workflow. This is usually quickly followed up by recommendations to learn git and to put your project on GitHub. Learning and doing all of this for the first time takes a lot of effort. Alongside all of the recommendations to learn these technologies are horror stories telling how difficult it can be and memes saying that no one really knows what they are doing!

There are a lot of reasons to not embrace the git but there are even more to go ahead and do it. This is an attempt to convince you that it’s all going to be worth it alongside a bunch of resources that make it easy to get started and academic papers discussing the issues that version control can help resolve.
This document will not address how to do version control but will instead try to answer the questions what you can do with it and why you should bother. It was inspired by a conversation on twitter.
Improvements to individual workflow
Ways that git and GitHub can help your personal computational workflow – even if your project is just one or two files and you are the only person working on it.
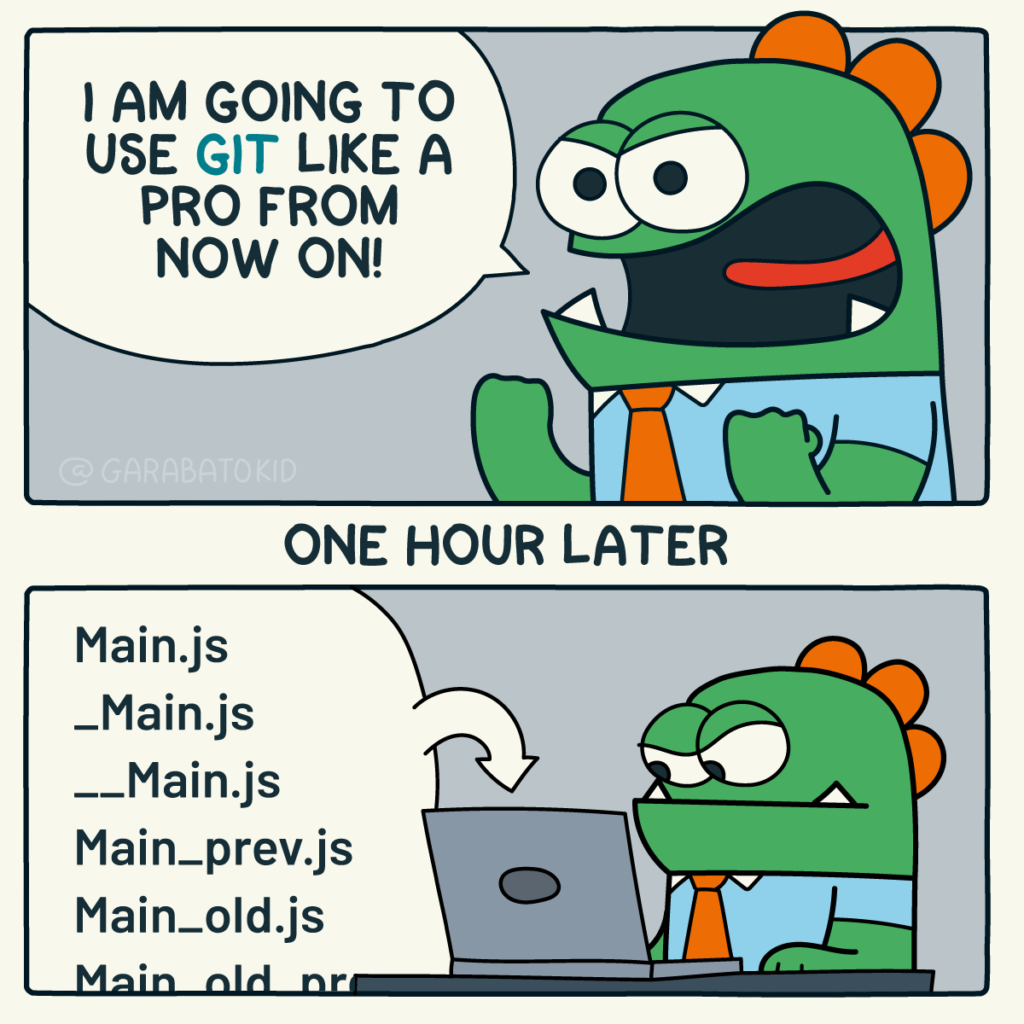
Fixing filename hell
Is this a familiar sight in your working directory?
mycode.py
mycode_jane.py
mycode_ver1b.py
mycode_ver1c.py
mycode_ver1b_january.py
mycode_ver1b_january_BROKEN.py
mycode_ver1b_january_FIXED.py
mycode_ver1b_january_FIXED_for_supervisor.py
For many people, this is just the beginning. For a project that has existed long enough there might be dozens or even hundreds of these simple scripts that somehow define all of part of your computational workflow. Version control isn’t being used because ‘The code is just a simple script developed by one person’ and yet this situation is already becoming the breeding ground for future problems.
- Which one of these files is the most up to date?
- Which one produced the results in your latest paper or report?
- Which one contains the new work that will lead to your next paper?
- Which ones contain deep flaws that should never be used as part of the research?
- Which ones contain possibly useful ideas that have since been removed from the most recent version?
Applying version control to this situation would lead you to a folder containing just one file
mycode.pyAll of the other versions will still be available via the commit history. Nothing is ever lost and you’ll be able to effectively go back in time to any version of mycode.py you like.
A single point of truth
I’ve even seen folders like the one above passed down generations of PhD students like some sort of family heirloom. I’ve seen labs where multple such folders exist across a dozen machines, each one with a mixture of duplicated and unique files. That is, not only is there a confusing mess of files in a folder but there is a confusing mess of these folders!
This can even be true when only one person is working on a project. Perhaps you have one version of your folder on your University HPC cluster, one on your home laptop and one on your work machine. Perhaps you email zipped versions to yourself from time to time. There are many everyday events that can lead to this state of affairs.
By using a GitHub repository you have a single point of truth for your project. The latest version is there. All old versions are there. All discussion about it is there.
Everything…one place.
The power of this simple idea cannot be overstated. Whenever you (or anyone else) wants to use or continue working on your project, it is always obvious where to go. Never again will you waste several days work only to realise that you weren’t working on the latest version.
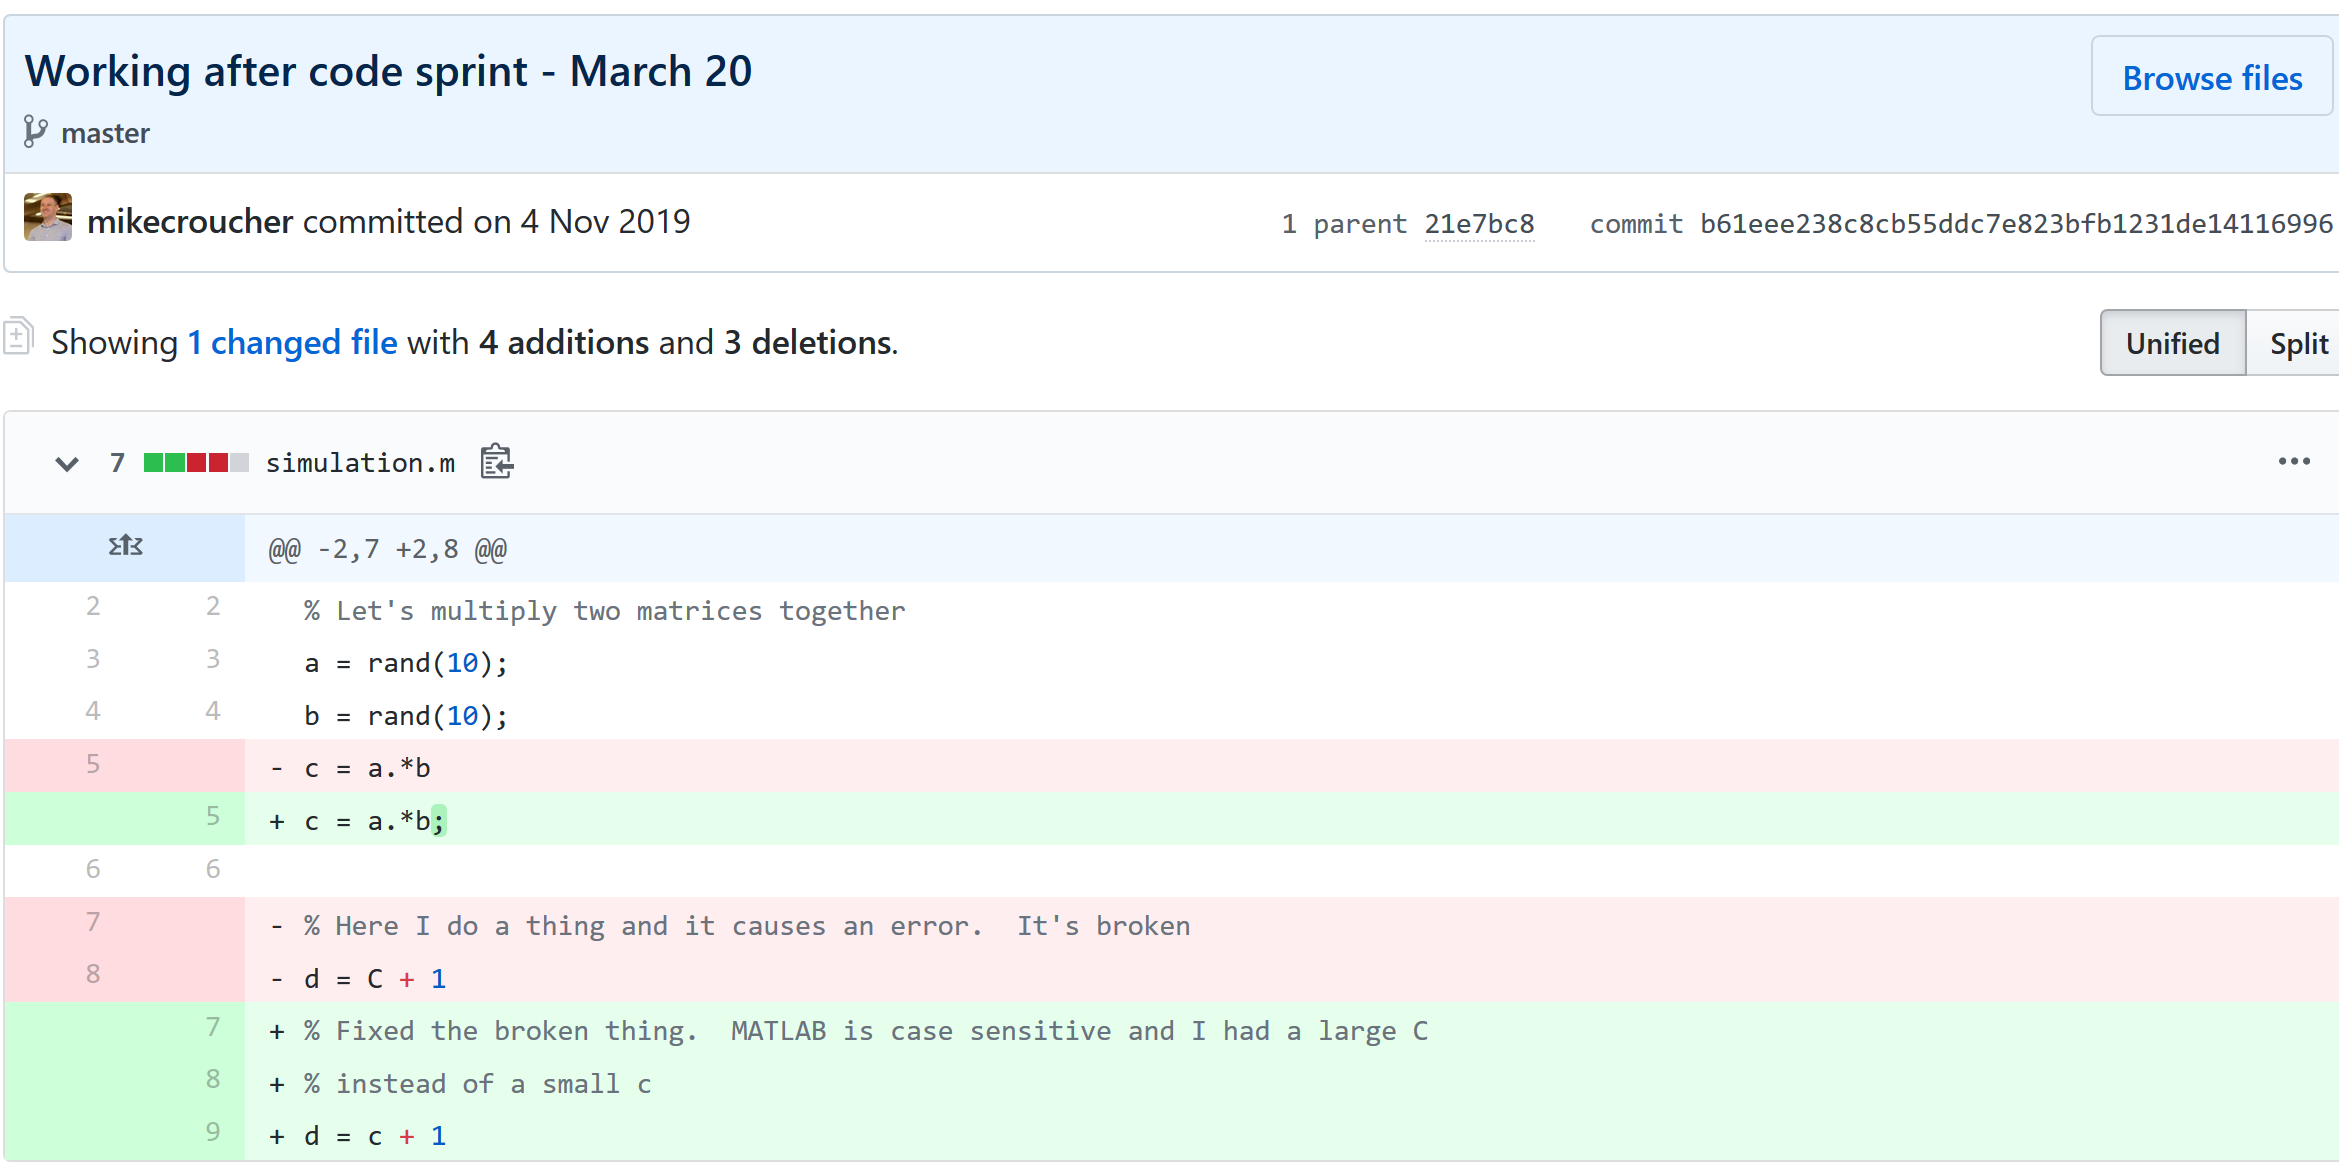
Keeping track of everything that changed
The latest version of your analysis or simulation is different from the previous one. Thanks to this, it may now give different results today compared to yesterday. Version control allows you to keep track of everything that changed between two versions. Every line of code you added, deleted or changed is highlighted. Combined with your commit messages where you explain why you made each set of changes, this forms a useful record of the evolution of your project.
It is possible to compare the differences between any two commits, not just two consecutive ones which allows you to track the evolution of your project over time.
Always having a working version of your project
Ever noticed how your collaborator turns up unnanounced just as you are in the middle of hacking on your code. They want you to show them your simulation running but right now its broken! You frantically try some of the other files in your folder but none of them seem to be the version that was working last week when you sent the report that moved your collaborator to come to see you.
If you were using version control you could easily stash your current work, revert to the last good commit and show off your work.
Tracking down what went wrong
You are always changing that script and you test it as much as you can but the fact is that the version from last year is giving correct results in some edge case while your current version is not. There are 100 versions between the two and there’s a lot of code in each version! When did this edge case start to go wrong?
With git you can use git bisect to help you track down which commit started causing the problem which is the first step towards fixing it.

Providing a back up of your project
Try this thought experiment: Your laptop/PC has gone! Fire, theft, dead hard disk or crazed panda attack.

It, and all of it’s contents have vanished forever. How do you feel? What’s running through your mind? If you feel the icy cold fingers of dread crawling up your spine as you realise Everything related to my PhD/project/life’s work is lost then you have made bad life choices. In particular, you made a terrible choice when you neglected to take back ups.
Of course there are many ways to back up a project but if you are using the standard version control workflow, your code is automatically backed up as a matter of course. You don’t have to remember to back things up, back-ups happen as a natural result of your everyday way of doing things.
Making your project easier to find and install
There are dozens of ways to distribute your software to someone else. You could (HORRORS!) email the latest version to a colleuage or you could have a .zip file on your web site and so on.
Each of these methods has a small cognitive load for both recipient and sender. You need to make sure that you remember to update that .zip file on your website and your user needs to find it. I don’t want to talk about the email case, it makes me too sad. If you and your collaborator are emailing code to each other, please stop. Think of the children!

One great thing about using GitHub is that it is a standardised way of obtaining software. When someone asks for your code, you send them the URL of the repo. Assuming that the world is a better place and everyone knows how to use git, you don’t need to do anything else since the repo URL is all they need to get your code. a git clone later and they are in business.
Additionally, you don’t need to worry abut remembering to turn your working directory into a .zip file and uploading it to your website. The code is naturally available for download as part of the standard workflow. No extra thought needed!
In addition to this, some popular computational environments now allow you to install packages directly from GitHub. If, for example, you are following standard good practice for building an R package then a user can install it directly from your GitHub repo from within R using the devtools::install_github() function.
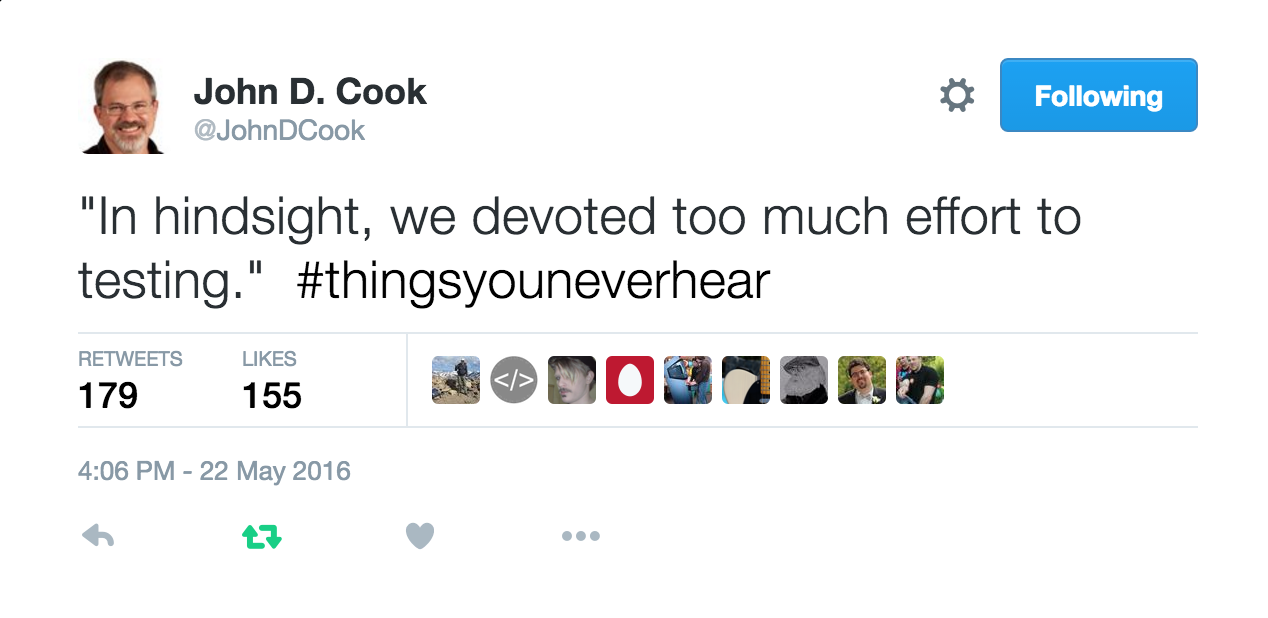
Automatically run all of your tests
You’ve sipped of the KoolAid and you’ve been writing unit tests like a pro. GitHub allows you to link your repo with something called Continuous Integration (CI) that helps maximise the utility of those tests.
Once its all set up the CI service runs every time you, or anyone else, makes a commit to your project. Every time the CI service runs, a virtual machine is created from scratch, your project is installed into it and all of your tests are run with any failures reported.
This gives you increased confidence that everything is OK with your latest version and you can choose to only accept commits that do not break your testing framework.
Collaboration and Community
How git and GitHub can make it easier to collaborate with others on computational projects.
Control exactly who can see your work
‘I don’t want to use GitHub because I want to keep my project private’ is a common reason given to me for not using the service. The ability to create private repositories has been free for some time now (Price plans are available here https://github.com/pricing) and you can have up to 3 collaborators on any of your private repos before you need to start paying. This is probably enough for most small academic projects.
This means that you can control exactly who sees your code. In the early stages it can be just you. At some point you let a couple of trusted collaborators in and when the time is right you can make the repo public so everyone can enjoy and use your work alongside the paper(s) it supports.
Faciliate discussion about your work
Every GitHub repo comes with an Issues section which is effectively a discussion forum for the project. You can use it to keep track of your project To-Do list, bugs, documentation discussions and so on. The issues log can also be integrated with your commit history. This allows you to do things like git commit -m "Improve the foo algorithm according to the discussion in #34" where #34 refers to the Issue discussion where your collaborator pointed out
Allow others to contribute to your work
You have absolute control over external contributions! No one can make any modifications to your project without your explicit say-so.
I start with the above statement because I’ve found that when explaining how easy it is to collaborate on GitHub, the first question is almost always ‘How do I keep control of all of this?’
What happens is that anyone can ‘fork’ your project into their account. That is, they have an independent copy of your work that is clearly linked back to your original. They can happily work away on their copy as much as they like – with no involvement from you. If and when they want to suggest that some of their modifications should go into your original version, they make a ‘Pull Request’.
I emphasised the word ‘Request’ because that’s exactly what it is. You can completely ignore it if you want and your project will remain unchanged. Alternatively you might choose to discuss it with the contributor and make modifications of your own before accepting it. At the other end of the spectrum you might simply say ‘looks cool’ and accept it immediately.
Congratulations, you’ve just found a contributing collaborator.
Reproducible research
How git and GitHub can contribute to improved reproducible research.
Simply making your software available
A paper published without the supporting software and data is (much!) harder to reproduce than one that has both.
Making your software citable
Most modern research cannot be done without some software element. Even if all you did was run a simple statistical test on 20 small samples, your paper has a data and software dependency. Organisations such as the Software Sustainability Institute and the UK Research Software Engineering Association (among many others) have been arguing for many years that such software and data dependencies should be part of the scholarly record alongside the papers that discuss them. That is, they should be archived and referenced with a permanent Digital Object Identifier (DOI).
Once your code is in GitHub, it is straightforward to archive the version that goes with your latest paper and get it its own DOI using services such as Zenodo. Your University may also have its own archival system. For example, The University of Sheffield in the UK has built a system called ORDA which is based on an institutional Figshare instance which allows Sheffield academics to deposit code and data for long term archival.
Which version gave these results?
Anyone who has worked with software long enough knows that simply stating the name of the software you used is often insufficient to ensure that someone else could reproduce your results. To help improve the odds, you should state exactly which version of the software you used and one way to do this is to refer to the git commit hash. Alternatively, you could go one step better and make a GitHub release of the version of your project used for your latest paper, get it a DOI and cite it.
This doesn’t guarentee reproducibility but its a step in the right direction. For extra points, you may consider making the computational environment reproducible too (e.g. all of the dependencies used by your script – Python modules, R packages and so on) using technologies such as Docker, Conda and MRAN but further discussion of these is out of scope for this article.
Building a computational environment based on your repository
Once your project is on GitHub, it is possible to integrate it with many other online services. One such service is mybinder which allows the generation of an executable environment based on the contents of your repository. This makes your code immediately reproducible by anyone, anywhere.
Similar projects are popping up elsewhere such as The Littlest JupyterHub deploy to Azure button which allows you to add a button to your GitHub repo that, when pressed by a user, builds a server in their Azure cloud account complete with your code and a computational environment specified by you along with a JupterHub instance that allows them to run Jupyter notebooks. This allows you to write interactive papers based on your software and data that can be used by anyone.
Complying with funding and journal guidelines
When I started teaching and advocating the use of technologies such as git I used to make a prediction These practices are so obviously good for computational research that they will one day be mandated by journal editors and funding providers. As such, you may as well get ahead of the curve and start using them now before the day comes when your funding is cut off because you don’t. The resulting debate was usually good fun.
My prediction is yet to come true across the board but it is increasingly becoming the case where eyebrows are raised when papers that rely on software are published don’t come with the supporting software and data. Research Software Engineers (RSEs) are increasingly being added to funding review panels and they may be Reviewer 2 for your latest paper submission.
Other uses of git and GitHub for busy academics
It’s not just about code…..
- Build your own websites using GitHub pasges. Every repo can have its own website served directly from GitHub
- Put your presentations on GitHub. I use reveal.js combined with GitHub pages to build and serve my presentations. That way, whenever I turn up at an event to speak I can use whatever computer is plugged into the projector. No more ‘I don’t have the right adaptor’ hell for me.
- Write your next grant proposal. Use Markdown, LaTex or some other git-friendly text format and use git and GitHub to collaboratively write your next grant proposal
The movie below is a visualisation showing how a large H2020 grant proposal called OpenDreamKit was built on GitHub. Can you guess when the deadline was based on the activity?
Further Resources
Further discussions from scientific computing practitioners that discuss using version control as part of a healthy approach to scientific computing
- Good Enough Practices in Scientific Computing –
- Is Your Research Software Correct? – A presentation from Mike Croucher discussing what can go wrong in computational research and what practices can be adopted to do help us do better
- The Turing Way A handbook of good practice in data science brought to you from the Alan Turning Institute
- A guide to reproducible code in ecology and evolution – A handbook from the British Ecological Society that discusses version control as part of general good practice
Learning version control
Convinced? Want to start learning? Let’s begin!
- Git lesson from Software Carpentry – A free, community written tutorial on the basics of git version control
Graphical User Interfaces to git
If you prefer not to use the command line, try these
I recently found myself in need of a portable install of the Jupyter notebook which made use of a portable install of R as the compute kernel. When you work in institutions that have locked-down managed Windows desktops, such portable installs can be a life-saver! This is particularly true when you are working with rapidly developing projects such as Jupyter and IRKernel.
It’s not perfect but it works for the fairly modest requirements I had for it. Here are the steps I took to get it working.
Download and install Portable Python
I downloaded Portable Python 2.7.6.1 from http://portablepython.com/ and installed into a directory called Portable Python 2.7.6.1
Update IPython and install the extra modules we need
This version of Portable Python comes with a portable IPython instance but it is too old to support alternative kernels. As such, we need to install a newer version.
Open a cmd.exe command prompt and navigate to Portable Python 2.7.6.1\App\Scripts.
Enter the command
easy_install ipython.exe
You’ll now find that you can launch the ipython.exe terminal from within this directory:
C:\Users\walkingrandomly\Desktop\Portable Python 2.7.6.1\App\Scripts>ipython
Python 2.7.6 (default, Nov 10 2013, 19:24:18) [MSC v.1500 32 bit (Intel)]
Type "copyright", "credits" or "license" for more information.

IPython 3.1.0 -- An enhanced Interactive Python.
?         -> Introduction and overview of IPython's features.
%quickref -> Quick reference.
help      -> Python's own help system.
object?   -> Details about 'object', use 'object??' for extra details.

In [1]: exit()
If you try to launch the notebook, however, you’ll get error messages. This is because we haven’t taken care of all the dependencies. Let’s do that now. Ensuring you are still in the Portable Python 2.7.6.1\App\Scripts folder, execute the following commands.
easy_install pyzmq
easy_install jinja2
easy_install tornado
easy_install jsonschema
You should now be able to launch the notebook using
ipython notebook
Install portable R and IRKernel
- I downloaded Portable R 3.2 from http://sourceforge.net/projects/rportable/files/ and installed into a directory called R-Portable
- Move this directory into the Portable Python directory. It needs to go inside Portable Python 2.7.6.1\App (see this discussion to learn how I discovered that this location was the correct one)
- Launch the Portable R executable which should be at Portable Python 2.7.6.1\App\R-Portable\R-portable.exe and install the IRKernel packages by doing
install.packages(c("rzmq","repr","IRkernel","IRdisplay"), repos="http://irkernel.github.io/")
Install additional R packages
The version of Portable R I used didn’t include various necessary packages. Here’s how I fixed that.
- Launch the Portable R executable which should be at Portable Python 2.7.6.1\App\R-Portable\R-portable.exe and install the following packages
install.packages('digest')
install.packages('uuid')
install.packages('base64enc')
install.packages('evaluate')
install.packages('jsonlite')
Install the R kernel file
Create the directory structure Portable Python 2.7.6.1\App\share\jupyter\kernels\R_kernel
Create a file called kernel.json that contains the following
{"argv": ["R-Portable/App/R-Portable/bin/i386/R.exe","-e","IRkernel::main()",
"--args","{connection_file}"],
 "display_name":"Portable R"
}
This file needs to go in the R_kernel directory created earlier. Note that the kernel location specified in kernel.json uses Linux style forward slashes in the path rather than the backslashes that Windows users are used to. I found that this was necessary for the kernel to work –it was ignored by the notebook otherwise.
Finishing off
Everything created so far, including R, is in the folder Portable Python 2.7.6
I created a folder called PortableJupyter and put the Portable Python 2.7.6 folder inside it. I also created the folder PortableJupyter\notebooks to allow me to carry my notebooks around with the software that runs them.
There is a bug in Portable Python 2.7.6.1 relating to scripts like IPython.exe that have been installed using easy_install. In short, they stop working if you move the directory they’re installed in – breaking portability somewhat! (Details here)
The workaround is to launch Ipython by running the script Portable Python 2.7.6.1\App\Scripts\ipython-script.py
I didn’t want to bother with that so created a shortcut in my PortableJupyter folder called Launch notebook. The target of this shortcut was the following line
%windir%\system32\cmd.exe /c "cd notebooks && "%CD%/Portable Python 2.7.6.1/App\python.exe" "%CD%/Portable Python 2.7.6.1\App\Scripts\ipython-script.py" notebook"
This starts the notebook using the default web browser and puts you in the notebooks directory.
The pay off
My folder looks like this:

If I click on the Launch Notebook shortcut, I get a Jupyter session with 2 kernel options
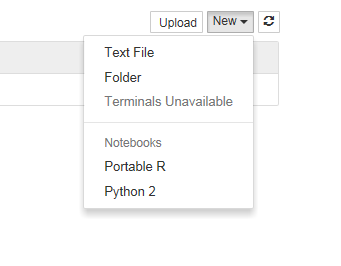
I can choose the Portable R kernel and start using R in the notebook!

I follow a lot of software developers on twitter so I get to see a lot of opinions and comments about git. Here are a few of my recent favourites
Opinions on git
I find that git is a technology that polarizes people. They either love it or they hate it…often both at the same time.
I didn’t know git would make make programming more addictive. Ups frequency of reward, via miniature accomplishments: commits.
— Alex Holcombe (@ceptional) November 12, 2014
Every time you write, “learn git” and follow this advice with “it’s dead simple!” a kitten cries.
— Anja Boskovic (@damedebugger) November 7, 2014
tries to teach 2 lab groups “git & github” .. actually spends most of the time working on installing/setup. oh Twitter. Just hold me.
— Andrew MacDonald (@polesasunder) November 6, 2014
Git Tutorials
I find that I learn something new every time I read a different tutorial
http://t.co/0OLz7jeghF walkthrough git from internals to (hopefully) better beginners/intermediate usage. Feedback welcomed!
— mrchlblng (@marchelbling) November 12, 2014
[new post] 5 Simple Git Power Tools: http://t.co/bpwRzMJYkx pic.twitter.com/PnAvwW8mcQ
— Jon Reid (@qcoding) November 11, 2014
There’s a new version of the Pro Git Book, and you can read it for free online http://t.co/LaIikATlk1
— Mike Hay (@Hay) November 7, 2014
Git tips and tricks
No matter how long you’ve used git, you can always learn a new trick or two.
duh! Didn’t know about git clean -fdx to clean out gitignored files. I’d been using powershell cmd to del bin/obj & manually del pkg folder
— Julie Lerman (@julielerman) November 6, 2014
alias hadouken="git push origin master -f"
— Chris Oliver (@excid3) November 6, 2014
How to Git Pretty http://t.co/w0CbWYwvvr +@bobthecow pic.twitter.com/AADRNFpuC3
— Elijah Manor (@elijahmanor) November 5, 2014
Update: September 2014 – The notes in this blog post have been uploaded to github: https://github.com/mikecroucher/Windows_Scientific_Computing. The blog post will be kept as-is for posterity reasons. For the most up to date version of the notes, see the github version.
Some time in 2013, I helped out at a Software Carpentry event at The University of Bath. As with most software carpentry boot camps, one of the topics covered was shell scripting and the scripting language of choice was bash. As I wandered around the room, I asked the delegates which operating system they use for the majority of their research and the most popular answer, by far, was Windows.
This led me to wonder if we should teach using a native Windows solution rather than relying on bash?
A few years ago, this would be an insane proposition since the Windows command shell is very weak compared to bash. PowerShell, on the other hand, is modern, powerful and installed on all modern Windows operating systems by default.
My problem was that I didn’t know PowerShell very well. So, I took the notes for the 2013 Bath shell scripting session – https://github.com/swcarpentry/boot-camps/tree/2013-07-bath/shell – and gave myself the exercise of converting them to PowerShell.
I got close to completing this exercise last summer but various things took higher priority and so the project languished. Rather than sit on the notes any longer, I’ve decided to just publish what I have so far in case they are useful to anyone.
You are free to use them with the following caveats
- This is not necessarily the right way to teach PowerShell. It is an experiment in converting some classroom-tested Linux based notes to PowerShell.
- If you use them, attribution would be nice. I am Mike Croucher, my site is www.walkingrandomly.com Details on how to contact me at https://www.walkingrandomly.com/?page_id=2055
- I have not yet tested these notes in a classroom situation
- These notes aren’t finished yet
- These notes have been developed and tested on Windows 7. Behaviour may be different using different versions of Windows.
- These notes are given as they were left sometime in mid 2013. Some things may be out of date.
- I was learning PowerShell as I developed these notes. As such, I fully expect them to be full of mistakes. Corrections and improvements would be welcomed.
If anyone is interested in developing these notes into something that’s classroom-ready, contact me.
The old Windows Command Shell
The traditional Windows command shell is a program called cmd.exe which can trace its roots all the way back to the old, pre-Windows DOS prompt.
You can launch this command shell as follows
- Hold down both the Windows button and the letter R to open the Run prompt
- Type cmd and press Enter or click OK

- You should see a window similar to the one below
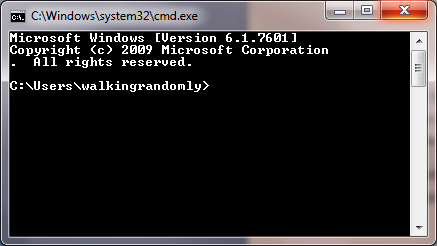
The Windows command shell hasn’t changed significantly for over twenty years and is relatively feature poor compared to more modern shells. For this reason, it is recommended that you use Windows PowerShell instead. Mention of cmd.exe is only included here since, despite its deficiencies, it is still widely in use
PowerShell
To launch PowerShell:
- Hold down both the Windows button and the letter R to open the Run prompt
- Type powershell and press Enter or click OK

- You should see a window similar to the one below

Note that although the header of the above window mentions v1.0, it could be a screenshot from either version 1.0 or version 2.0. This is a well-known bug. If you are using Windows 7 you will have version 2 at the minimum.
PowerShell versions
At the time of writing, PowerShell is at version 3. Ideally, you should at least have version 2.0 installed. To check version:
$psversiontable.psversion

Major  Minor  Build  Revision
-----  -----  -----  --------
3      0      -1     -1
If this variable does not exist, you are probably using version 1.0 and should upgrade.
Version 3.0 is available at http://blogs.technet.com/b/heyscriptingguy/archive/2013/06/02/weekend-scripter-install-powershell-3-0-on-windows-7.aspx
Comments
# This is a comment in Powershell. It is not executed
Directories
Users of Bash will feel right at home at first since PowerShell appears to have the same set of commands
pwd                         #Path to current folder
ls                          #List directory
ls *.txt                    #Wild Card
ls *_hai*
ls -R                       #Recursive folder listing
ls .                        #List current folder
ls ..                       #List Parent folder
cd ..                       #Change current folder to parent. (Move up a folder)
cd ~                        #Change current folder to your user directory.
mkdir myfolder              #Create a folder
mkdir ~/myfolder
mv myfolder new_myfolder    #rename myfolder to new_myfolder
rm -r new_myfolder          #Delete new_myfolder if its empty
Files
cat file                    # View file
more file                   # Page through file
cat file | select -first 3  # first N lines
cat file | select -last 2   # Last N lines
cp file1 file2              # Copy
cp *.txt directory
rm file.txt                 # Delete - no recycle bin.
rm -r directory             # Recurse
Different command types in PowerShell: Aliases, Functions and Cmdlets
Many of the PowerShell ‘commands’ we’ve used so far are actually aliases to Powershell Cmdlets which have a Verb-Noun naming convention. We can discover what each command is an alias of using the get-alias cmdlet.
PS > get-alias ls

CommandType     Name                                                Definition
-----------     ----                                                ----------
Alias           ls                                                  Get-ChildItem
This shows that ls is an alias for the Cmdlet Get-ChildItem
A list of aliases for common Bash commands:
- cat (Get-Content)
- cd (Set-Location)
- ls (Get-ChildItem)
- pwd (Get-Location)
One reason why aliases were created is to make PowerShell a more familiar environment for users of other shells such as the old Windows cmd.exe or Linux’s Bash environment and also to save on typing.
You can get a list of all aliases using get-alias on its own.
PS > get-alias
Finally, here’s how you get all of the aliases for the Get-ChildItem cmdlet.
get-alias | where-object {$_.Definition -match "Get-Childitem"}
For more details on Powershell aliases, see Microsoft’s documentation at http://technet.microsoft.com/en-us/library/ee692685.aspx
What type of command is mkdir?
The mkdir command looks like it might be an alias as well since it doesn’t have the verb-noun naming convention of Cmdlets. Let’s try to see which Cmdlet it might be an alias of:
PS > get-alias mkdir

Get-Alias : This command cannot find a matching alias because alias with name 'mkdir' do not exist.
At line:1 char:6
+ alias <<<<  mkdir
    + CategoryInfo          : ObjectNotFound: (mkdir:String) [Get-Alias], ItemNotFoundException
    + FullyQualifiedErrorId : ItemNotFoundException,Microsoft.PowerShell.Commands.GetAliasCommand
It turns out that mkdir isn’t an alias at all but is actually yet another PowerShell command type, a function. We can see this by using the get-command Cmdlet
PS > get-command mkdir
CommandType     Name                                                Definition
-----------     ----                                                ----------
Function        mkdir                                               ...
Application     mkdir.exe                                           C:\Program Files (x86)\Git\bin\mkdir.exe
Now we can clearly see that mkdir is a PowerShell function. The mkdir.exe is an Application which you’ll only see if you installed git for windows as I have.
Cmdlets
A Cmdlet (pronounced ‘command-let’) is a .NET class but you don’t need to worry abut what this means until you get into advanced PowerShell usage. Just think of Cmdlets as the base type of PowerShell command. They are always named according to the convention verb-noun; for example Set-Location and Get-ChildItem.
Listing all Cmdlets
The following lists all Cmdlets
Get-Command
You can pipe this list to a pager
Get-Command | more
Getting help
You can get help on any PowerShell command using the -? switch. For example
ls -?
When you do this, you’ll get help for the Get-ChildItem Cmdlet which would be confusing if you didn’t know that ls is actually an alias for Get-ChildItem
History
Up arrow browses previous commands.
By default, PowerShell version 2 remembers the last 64 commands whereas PowerShell version 3 remembers 4096. This number is controlled by the $MaximumHistoryCount variable
PS > $MaximumHistoryCount           #Display the current value
PS > $MaximumHistoryCount=150       #Change it to 150
PS > history                        #Display recent history using the alias version of the command
PS > get-history                    #Display recent history using the Cmdlet direct
Although it remembers more, PowerShell only shows the last 32 commands by default. To see a different number, use the count switch
PS > get-history -count 50
To run the Nth command in the history use Invoke-History
PS > invoke-history 7
Word count (and more) using Measure-Object
Linux has a command called wc that counts the number of lines and words in a file. Powershell has no such command but we can do something similar with the Measure-Object Cmdlet.
Say we want to count the number of lines, words and characters in the file foo.txt. The first step is to get the content of the file
get-content foo.txt # gets the content of foo.txt
Next, we pipe the result of the get-content Cmdlet to Measure-Object, requesting lines, words and characters
get-content foo.txt | measure-object -line -character -word
The measure-object Cmdlet can also count files
ls *.txt | measure-object #Counts number of .txt files in the current folder
When you execute the above command, a table of results will be returned:
Count    : 3
Average  :
Sum      :
Maximum  :
Minimum  :
Property :
This is because the measure-object Cmdlet, like all PowerShell Cmdlets, actually returns an object and the above table is the textual representation of that object.
The fields in this table hint that measure-object can do a lot more than simply count things. For example, here we find some statistics concerning the file lengths found by the ls *.txt command
ls *.txt | measure-object -property length -minimum -maximum -sum -average
You may wonder exactly what type of object has been returned from measure-object and we can discover this by running the gettype() method of the returned object
(ls *.txt | measure-object).gettype()
Request just the name as follows
(ls *.txt | measure-object).gettype().Name

GenericMeasureInfo
To find out what properties an object has, pass it to the get-member Cmdlet
#Return all member types
ls *.txt | get-member

#Return only Properties
ls *.txt | get-member -membertype property
Sometimes, you’ll want to simply return the numerical value of an object’s property and you do this using the select-object Cmdlet. Here we ask for just the Count property of the GenericMeasureInfo object returned by measure-object.
#Counts the number of *.txt files and returns just the numerical result
ls *.txt | measure-object | select-object -expand Count
Searching within files
The Unix world has grep, PowerShell has Select String. Try running the following on haiku.txt
Select-String the haiku.txt                             #Case insensitive by default, unlike grep
Select-String the haiku.txt -CaseSensitive              #Behaves more like grep
Select-String day haiku.txt -CaseSensitive
Select-String is haiku.txt -CaseSensitive
Select-String 'it is' haiku.txt -Casesensitive
There is no direct equivalent to grep’s -w switch.
grep -w is haiku.txt #exact match
However, you can get the same behaviour using the word boundary anchors, \b
Select-String \bis\b haiku.txt -casesensitive
Grep has a -v switch that shows all lines that do not match a pattern. Select-String makes use of the -notmatch switch.
BASH: grep -v "is" haiku.txxt
PS: select-string -notmatch "is" haiku.txt -CaseSensitive
Grep has an -r switch which stands for ‘recursive’. The following will search through all files and subfolders of your current directory, looking for files that contain is
grep -r is *
Select-String has no direct equivalent to this. However, you can do the same thing by using get-childitem to get the list of files, piping the output to select-string
get-childitem * -recurse | select-string is
One difference between grep and Select-String is that the latter includes the filename and line number of each match.
grep the haiku.txt

Is not the true Tao, until
and the presence of absence:

Select-String the haiku.txt -CaseSensitive

haiku.txt:2:Is not the true Tao, until
haiku.txt:6:and the presence of absence:
To get the grep-like output, use the following
Select-String the haiku.txt -CaseSensitive | ForEach-Object {$_.Line}

Is not the true Tao, until
and the presence of absence:
To understand how this works, you first have to know that Select-String returns an array of MatchInfo objects when there is more than one match. To demonstrate this:
$mymatches = Select-String the haiku.txt -CaseSensitive  #Put all matches in the variable 'mymatches'
$mymatches -is [Array]          #query if 'match' is an array

True
So, mymatches is an array. We can see how many elements it has using the array’s Count property
$mymatches.Count

2
The type of elements in PowerShell arrays don’t necessarily have to be the same. In this case, however, they are.
$mymatches[0].gettype()
$mymatches[1].gettype()
both of these give the output
IsPublic IsSerial Name                                     BaseType
-------- -------- ----                                     --------
True     False    MatchInfo                                System.Object
If all you wanted was the name of the first object type, you’d do
$mymatches[0].gettype().name

MatchInfo
Alternatively, we could have asked for each element’s type using the For-Each-Object Cmdlet to loop over every object in the array.
$mymatches | Foreach-Object {$_.gettype().Name}
Where $_ is a special variable that effectively means ‘current object’ or ‘The object currently being considered by Foreach-Object’ if you want to be more verbose.
So, we know that we have an array of 2 MatchInfo objects in our variable mymatches. What does this mean? What properties do MatchInfo objects have? We can find out by piping one of them to the Get-Member Cmdlet.
$mymatches[0] | Get-Member

   TypeName: Microsoft.PowerShell.Commands.MatchInfo

Name         MemberType Definition
----         ---------- ----------
Equals       Method     bool Equals(System.Object obj)
GetHashCode  Method     int GetHashCode()
GetType      Method     type GetType()
RelativePath Method     string RelativePath(string directory)
ToString     Method     string ToString(), string ToString(string directory)
Context      Property   Microsoft.PowerShell.Commands.MatchInfoContext Context {get;se
Filename     Property   System.String Filename {get;}
IgnoreCase   Property   System.Boolean IgnoreCase {get;set;}
Line         Property   System.String Line {get;set;}
LineNumber   Property   System.Int32 LineNumber {get;set;}
Matches      Property   System.Text.RegularExpressions.Match[] Matches {get;set;}
Path         Property   System.String Path {get;set;}
Pattern      Property   System.String Pattern {get;set;}
Now we can see that each MatchInfo object has a Line property and it’s reasonable to guess that this contains a Line containing a match. Taking a look:
$mymatches[0].Line

Is not the true Tao, until
Bringing together everything we’ve seen so far, we pull out the Line property of each element in the array as follows
$mymatches | Foreach-Object {$_.Line}
Alternatively, we can ditch the $mymatches variable and pipe in the output of Select-String directly
Select-String the haiku.txt -CaseSensitive | ForEach-Object {$_.Line}

Is not the true Tao, until
and the presence of absence:
Regular expressions
select-string 's*is' haiku.txt        # * Zero or more of preceding token
select-string 's+is' haiku.txt        # + On or more of preceding token
select-string '.nd'  haiku.txt        # . Any token followed by 'nd'
select-string 'es'   haiku.txt        # matches 'es'
select-string 'es[ht]' haiku.txt      # Exactly one of the characters listed
select-string 'es[^ht]' haiku.txt     # Matches everything except h and t
select-string 'ex[
select-string '\bis\b' haiku.txt      # \b word boundaries
Input and output redirection
> redirects output (AKA standard output). This works in both Bash and Powershell scripts. For example, in Bash we might do
#BASH
grep -r not * > found_nots.txt
Drawing on what we’ve learned so far, you might write the PowerShell version of this command as
#PS
get-childitem *.txt -recurse | select-string not > found_nots.txt
However, if you do this, you will find that the script will run forever with the hard-disk chugging like crazy. If you’ve run the above command, CTRL and C will stop it. This is because Powershell is including the output file, found_nots.txt, in its input which leads to an infinite loop. To prevent this, we must explicitly exclude the output file from the get-childitem search
get-childitem *.txt -Exclude 'found_nots.txt' -recurse | select-string not > found_nots.txt

cat found_nots.txt
ls *.txt > txt_files.txt
cat txt_files.txt
In Linux, < redirects input (AKA standard input). This does not work in PowerShell:
cat < haiku.txt
At line:1 char:5
+ cat < haiku.txt
+     ~
The '<' operator is reserved for future use.
    + CategoryInfo          : ParserError: (:) [], ParentContainsErrorRecordException
    + FullyQualifiedErrorId : RedirectionNotSupported
The above is a forced use of < since one could simply do
cat haiku.txt
Recall that cat is an alias for get-content. The use of get-content is an idiom that gets around the lack an < operator. For example, instead of
foo < input.txt
One does
get-content input.txt | foo
Error messages are output on standard error
ls idontexist.txt > output.txt
cat output.txt                  #output.txt is empty
ls idontexist.txt 2> output.txt               # 2 is standard error
ls haiku.txt 1> output.txt                    # 1 is standard output
ls haiku.txt,test_file.txt 2>&1 > output.txt  # Combine the two streams.
Searching for files
# Find all
UNIX: find .
PS: get-childitem .  -Recurse
PS: get-childitem .  -Recurse | foreach-object {$_.FullName}    #To give identical output as `find`
To save on typing, you can use the alias gci instead of get-childitem
# Directories only
UNIX: find . -type d
PS2: gci . -recurse | where { $_.PSIsContainer }
PS3: gci -recurse -Directory
If you have PowerShell 2, you can only use the long winded version. It’s simpler in PowerShell 3. Similarly for searching for files only.
# Files only
UNIX: find . -type f
PS2: get-childitem -recurse | where { ! $_.PSIsContainer }
PS3: gci -recurse -File
With the Unix find command, you can specify the maximum and minimum search depths. There is no direct equivalent in PowerShell although you could write a function that will do this. Such a function can be found at http://windows-powershell-scripts.blogspot.co.uk/2009/08/unix-linux-find-equivalent-in.html although I have not tested this!
# Maximum depth of tree
UNIX: find . -maxdepth 2
PS : No direct equivalent
# Minimum depth of tree
UNIX: find . -mindepth 3
PS : No direct equivalent
You can also filter by name. Confusingly, PowerShell offers two ways of doing this. More details on the differences between these can be found at http://tfl09.blogspot.co.uk/2012/02/get-childitem-and-theinclude-and-filter.html
One key difference between find and get-childitem is that the latter is case-insenstive whereas find is case sensitive.
# Find by name
UNIX: find . -name '*.txt'
PS: gci -recurse -include *.txt
PS: gci -recurse -filter *.txt

#Find empty files
UNIX: find . -empty
PS: gci -recurse | where ($_.Length -eq 0) | Select FullName

#Create empty file
UNIX: touch emptyfile.txt
PS: new-item emptyfile.txt -type file
Command Substituion
In bash, you can execute a command using backticks and the result is substituted in place. i.e.
#bash
foo `bar`
The backticks are used as escape characters in PowerShell so you do the following instead
#PS
foo $(bar)
In both cases, the command bar is executed and result is substituted into the call to foo.
Power of the pipe
| is a pipe. Use the pipe to connect the output of one command to the input of another:
Count text files
ls -filter *.txt | measure
ls outputs a list of files, measure inputs a list of files.
echo "Number of .txt files:"; ls -filter *.txt | measure | select -expand count
; equivalent to running two commands on separate lines.
Question: what does this do?
ls -name | select-string s | measure
Answer: counts the number of files with s in their name.
history | select-string 'echo'
Power of well-defined modular components with well-defined interfaces,
- Bolt together to create powerful computational and data processing workflows.
- Good design principle applicable to programming – Python modules, C libraries, Java classes – modularity and reuse.
- “little pieces loosely joined” –
history+select-string= function to search for a command.
Variables
get-variable                            # See all variables
$MYFILE="data.txt"                      # Need quotes around strings
echo $MYFILE
echo "My file name is $MYFILE"
$num = 1                                #Numbers don't need quotes
$num = $num+1                           #Simple Arithmetic
$TEXT_FILES=get-childitem               Save output of get-childitem
echo $TEXT_FILES
Variables only persist for the duration of the current PowerShell Session
Environment variables
Windows environment variables don’t show up when you execute get-variable; to list them all you do
#PS
get-childitem env:                  #Show all Windows Environment variables
echo $env:PATH                      #Show the contents of PATH
$env:Path = $env:Path + ";C:\YourApp\bin\"  #temporarily add a folder to PATH
This modification to PATH will only last as long as the current session. It is possible to permanently modify the system PATH but this should only be done with extreme care and is not covered here.
PowerShell Profile
The PowerShell profile is a script that is executed whenever you launch a new session. Every user has their own profile. The location of your PowerShell profile is defined by the variable $profile
$profile
Open it with
notepad $profile
Add something to it such as
echo "Welcome to PowerShell. This is a message from your profile"
Restart PowerShell and you should see the message. You can use this profile to customise your PowerShell sessions. For example, if you have installed NotePad++, you might find adding the following function to your PowerShell Profile to be useful.
# Launch notepad++ using the npp command
function npp($file)
{
if ($file -eq $null)
    {
        & "C:\Program Files (x86)\Notepad++\notepad++.exe";
    }
    else
    {
        & "C:\Program Files (x86)\Notepad++\notepad++.exe" $file;
    }
}
With this function in your profile, you can open Notepad++ with the command npp or npp(filename.txt)
Conditionals
$num = 1
if($num -eq 1)
{
  write-host 'num equals 1'
}

$word="hello"
if($word -eq "hello")
{
  write-host 'The same'
}
By default, string tests are case insensitive
$word="hello"
if($word -eq "HELLO")
{
  write-host 'The same'
}
To force them to be case sensitive, add a c to the operator:
$word="hello"
if($word -ceq "HELLO")
{
  write-host 'The Same. This won't be printed'
}
You can similarly be explicitly case insensitive by adding an i. Although this is the the same behaviour as the undecorated operators and so might seem unnecessary, it shows your intent to the reader.
    $word="hello"
    if($word -ieq "HELLO")
    {
      write-host 'The same'
    }
Comparison Operators
-eq Equal to
-lt Less than
-gt Greater than
-ge Greater than or equal to
-le Less than or equal to
-ne Not equal to
Logical operators
-not    Not
!       Not
-or     Or
-and    And
Loops
PowerShell has several looping constructs. Here, I only consider two.
for
Allows you to run a block of code a set number of times.
for ($i=1; $i -le 5; $i=$i+1)
{
   Write-Host $i
}
foreach
Do something with every element of a collection
foreach($item in $(ls *.txt)) {echo $item.Name}
foreach vs foreach-object
TODO
Shell scripts
- Save retyping.
- PowerShell scripts have the extension .ps1
- PowerShell scripts must be created with plain text editors such as Notepad or Notepad++. NEVER use Microsoft Word!
Here is a very simple script
notepad protein_filter.ps1                  #Open the file

#A simple protein filter
$DATE = get-date
echo "Processing date: $DATE"

foreach($item in get-childitem *.pdb)
{
   echo $item.Name
}

echo "Processing complete"
To run this just type the filename:
protein_filter.ps1
If you get an error message, it may be because your execution policy is set not to run scripts locally. Change this with the command
Set-ExecutionPolicy RemoteSigned            #Allow local scripts to run.  Needs to be run with admin privileges
protein_filter.ps1                          #Run the script
Download files via command-line
Primary Care Trust Prescribing Data – April 2011 onwards
$file="prim-care-trus-pres-data-apr-jun-2011-dat.csv"
$path="$pwd\$file"   #Path needs to be fully qualified. This puts it in the current folder
$url = "http://www.ic.nhs.uk/catalogue/PUB02342/$file"
$client = new-object System.Net.WebClient
$client.DownloadFile( $url, $path )
Permissions
Windows file permissions are rather more complicated than those of Linux but most users won’t need to worry about them in day to day use.
The call operator
It is sometimes convenient to construct strings that contain the full path to a PowerShell script we want to execute. For example:
$fullpath = "$pwd\myscript.ps1"
To actually run the script pointed to by this variable, you need to use the call operator &
& $fullpath #Runs myscript.ps1
You also need to do this if you try to call any script where the path contains spaces
"C:\Program Files\myscript.ps1"             #Will just display the string literal
& "C:\Program Files\myscript.ps1"           #Runs the script
Background Jobs
Consider the script counter.ps1
param($step=1)
#counter.ps1: A simple, long running job to demonstrate background jobs

$i=1

while ( $i -lt 200000 )
{
    echo $i
    $i=$i+$step
}
This counts up to 200000 in user-defined steps.
./counter.ps1   > 1step.txt                 #Counts in steps of 1
./counter.ps1 -step 2 > 2step.txt           #Counts in steps of 2
The script takes quite a while to complete and you cannot do anything else in your PowerShell session while it is working. Using the start-job Cmdlet, we can run counter.ps1 in the background
start-job -scriptblock { C:\Users\walkingrandomly\Dropbox\SSI_Windows\dir_full_of_files\some_directory\counter.ps1 > C:\Users\walkingrandomly\Dropbox\SSI_Windows\dir_full_of_files\some_directory\outcount1.txt }
Note that you have to use the full path to both the counter.ps1 script and the output file. You can see the status of the job with get-job
get-job

Id              Name            State      HasMoreData     Location             Command
--              ----            -----      -----------     --------             -------
1              Job1             Running    True            localhost             C:\Users\walkingrando...
Eventually, your job will complete
get-job

Id              Name            State      HasMoreData     Location             Command
--              ----            -----      -----------     --------             -------
1               Job1            Completed  False           localhost             C:\Users\walkingrando...

ls outcount*                    #Ensure that output file has been created
remove-job 1                    #remove remnants of job 1 from the queue
get-job                         #Check that queue is empty
You can run as many simultaneous jobs as you like but it is best not to run too many or your computer will grind to a halt.
Here’s an example that runs 5 counter.ps1 jobs concurrently
#parallel_counters.ps1
#Runs 5 instances of counter.ps1 in parallel

$scriptname     = "counter.ps1"
$outputfileBase = "outfile"
$outputfileExt  = ".txt"

$scriptPath = "$pwd\$scriptname"

for ($i=1; $i -le 5; $i++)
{
  $outputfilePath = "$pwd\$outputfileBase" + $i + $outputfileExt
  $command = "$scriptPath -step $i `> $outputfilePath"
  $myScriptBlock = [scriptblock]::Create($command)
  start-job -scriptblock $myScriptBlock
}
Run this as a demonstration
parallel_counters.ps1
get-job                             #Keep running until all have completed
ls outfile*
more outfile5.txt
more outfile2.txt
$myjob=get-job 2                    #Get info on job Id 2 and store in variable $myjob
$myjob.Command                      #Look at the command that comprised job 2
remove-job *                        #Remove all job remnants from the queue
get-job                             #Should be empty
TODO: Dealing with output, recieve-job
Secure Shell
There is no equivalent to the Linux commands ssh and sftp in PowerShell. The following free programs are recommended
- http://www.chiark.greenend.org.uk/~sgtatham/putty/ – PuTTY is a free implementation of Telnet and SSH for Windows and Unix platforms.
- http://winscp.net/eng/index.php – Free SFTP, SCP and FTP client for Windows.
- http://mobaxterm.mobatek.net/ – A more advanced terminal than PuTTY with a free ‘personal edition’ and a paid-for ‘professional edition’
Packaging
There are no direct PowerShell equivalents to zip, unzip, tar etc. There are write-zip, write-tar and write-gzip cmdlets in the third party, free PowerShell Community Extensions but I have not investigated them yet.
Transcripts
Start-transcript Initializes a transcript file which records all subsequent input/Output. Use the following syntax:
Start-Transcript [[-path] FilePath] [-force] [-noClobber] [-append]
Stop-transcript Stops recording and finalizes the transcript.
start-transcript -path ./diary.txt
ls
echo "Hello dear diary"
stop-transcript
cat diary.txt
- Record commands typed, commands with lots of outputs, trial-and-error when building software.
- Send exact copy of command and error message to support.
- Turn into blog or tutorial.
Shell power
(Bentley, Knuth, McIlroy 1986) Programming pearls: a literate program Communications of the ACM, 29(6), pp471-483, June 1986. DOI: [10.1145/5948.315654].
Dr. Drang, More shell, less egg, December 4th, 2011.
Common words problem: read a text file, identify the N most frequently-occurring words, print out a sorted list of the words with their frequencies.
10 plus pages of Pascal … or … 1 line of shell
#BASH version
$ nano words.sh
tr -cs A-Za-z '\n' | tr A-Z a-z | sort | uniq -c | sort -rn | sed ${1}q
$ chmod +x words.sh
$ nano words.sh < README.md
$ nano words.sh < README.md 10
The PowerShell version is more complicated but still very short compared to the 10 pages of Pascal
#count_words.ps1
Param([string]$filename,[int]$num)
$text=get-content $filename
$split = foreach($line in $text) {$line.tolower() -split "\W"}
$split | where-object{-not [string]::IsNullorEmpty($_)} |  group -noelement | sort Count -Descending | select -first $num

count_words.sh README.md 10
“A wise engineering solution would produce, or better, exploit-reusable parts.” – Doug McIlroy
Links
- Software Carpentry‘s online Bash shell lectures.
- G. Wilson, D. A. Aruliah, C. T. Brown, N. P. Chue Hong, M. Davis, R. T. Guy, S. H. D. Haddock, K. Huff, I. M. Mitchell, M. Plumbley, B. Waugh, E. P. White, P. Wilson (2012) “Best Practices for Scientific Computing“, arXiv:1210.0530 [cs.MS].
One of my favourite parts of my job at The University of Manchester is the code optimisation service that my team provides to researchers there. We take code written in languages such as MATLAB, Python, Mathematica and R and attempt (usually successfully) to make them go faster. It’s sort of a cross between training and consultancy, is a lot of fun and we can help a relatively large number of people in a short time. It also turns out to be very useful to the researchers as some of my recent testimonials demonstrate.
Other researchers,however, need something more. They already have a nice piece of code with several users and a selection of papers. They also have a bucket-load of ideas about how to turn this nice code into something amazing. They have all this good stuff and yet they find that they are struggling to get their code to the next level. What these people need is some quality time with a team of research software engineers.
Enter the Software Sustainability Institute (SSI), an organisation that I have been fortunate enough to have a fellowship with throughout 2013. These guys are software-development ninjas, have extensive experience with working with academic researchers and, right now, they have an open call for projects. It’s free to apply and, if your application is successful, all of their services will be provided for free. If you’d like an idea of the sort of projects they work on, take a look at the extensive list of past projects.
So, if you are a UK-based researcher who has a software problem, and no one else can help, maybe you can hire* the SSI team.
*for free!
Links
Right now it’s packaging season (not the official term!) at my university–a time of year when IT staff have to battle with silent installers, SCCM, MSI creation and Adminstudio in order to create the student desktop image for the next academic year. Packaging season makes me grouchy, it makes me work late and it makes me massively over-react to every minor installation issue caused by software vendors. Right now, however, I am not grouchy because of packaging season..I am grouchy because of concurrent network licensing (or floating licensing if you are Wikipedia).
I like network licenses…they make many aspects of my job easier but they the way they are implemented by some software vendors causes them to be a pain. Over the years, I’ve bothered many a support-desk with my network license tails of woe and thought that I would collate them all together in one blog post.
The more of these things your software does, the more pain you cause me and my colleagues.
1. You don’t use standard FlexLM/FlexNet.
Like it or loathe it, FlexLM is used by the vast majority of software vendors out there. We run license servers that host dozens of FlexLM based applications and we have got the administration of these down to a fine art. In fact, we’ve replaced the vast majority of the process with a script. If an application uses FlexLM, system administration and license monitoring is bordering on the trivial for us now. The further you stray away from FlexLM, the more difficult our job becomes.
One thing guaranteed to ruin my day is a call from a vendor I’ve worked with for years who says ‘Great news Mike, we’re ditching FlexLM for our own, in house license system.’ Fabulous! Rather than use our lovely, generic, one-size fits all scripts, we are going to have to do a load of extra work and testing just for you. I look forward to all the new and interesting bugs your system will generate.
2. You don’t support redundant license servers.
The idea behind redundant license servers is this: Instead of your application relying on just one machine, it relies on three; only two of which have to be operational at any one time. This gives us resiliency and resiliency is a good thing when you are teaching a lab with 120 students in it.
I’ll keep this simple. If you don’t support redundant license servers, it means that you don’t believe that your software is important. It tells me that you are just playing at being a big, grown up piece of software but you don’t really think anyone will take you seriously.
3. You support redundant license servers but can’t select them via the installer.
At install time, there is no option to give three severs. The user can only give one. You then expect the user to copy a pre-prepared license file that has details of all three servers as a post-installation step.
What usually happens here is that users give the primary license server, find that the application will launch and stop reading the installation instructions. At some point in the future, we take down the primary license server for maintenance and the vast majority of self-serve installations break!
4. You use the LM_LICENSE_FILE environment variable
The problem is, so does everyone else. We end up with a situation where the LM_LICENSE_FILE variable is pointing at several license servers and some client applications really don’t like that. Be a good FlexLM citizen and use a vendor specific environment variable. For example, MATLAB uses MLM_LICENSE_FILE and I could give them a big hug just for that!
5. You ‘helpfully’ tell the user when the license is about to expire.
I’ve moaned about this before. 1000 users panicking and emailing the helpdesk…lovely! Bonus points are awarded if you don’t allow any supported way of switching these warnings off.
6. Your new license doesn’t support old clients.
This should speak for itself and happens more than I’d like. We can’t upgrade the entire estate instantaneously and even if we could, we probably wouldn’t want to. Some users, for one reason or another, cling to old versions of your software like grim death. They don’t care that there is a new shiny version available, all they know is that I broke their application and they hate me for it.
When we discover that old versions of your application will stop working, it also delays roll out of the new version since we have to do a lot of user-communications and ensure that nothing mission-critical will stop working. This makes power-users of your application hate me because they want the new shiny version.
7. You don’t have a silent installer.
Strictly speaking not a network license moan but closely related. We use network licensing because we deploy your software to lots of machines. When I say ‘lots’ I mean thousands. It turns out, however, that you don’t support scripted installation (sometimes called ‘silent installation’ or ‘unattended installation’). This means that your software is a lot more difficult to deploy than your competitor! I’m now a big fan of your competitor!
8. You have a silent installer but it’s a bad one.
If I install manually, via point and click, I can configure every aspect of your application. Your silent installer, on the other hand, is just a /S switch that does a default install…no configuration possible. Bonus points for ‘silent’ installers that include pop-up dialogue boxes that can’t be switched off.
While on the topic of silent installation, can I just ask that you directly support deployment by SCCM on Windows please? It will help with next year’s packaging season big time!
Cheers,
Mike
From time to time I find myself having to write or modify windows batch files. Sometimes it might be better to use PowerShell, VBScript or Python but other times a simple batch script will do fine. As I’ve been writing these scripts, I’ve kept notes on how to do things for future reference. Here’s a summary of these notes. They were written for my own personal use and I put them here for my own convenience but if you find them useful, or have any comments or corrections, that’s great.
These notes were made for Windows 7 and may contain mistakes, please let me know if you spot any. If you use any of the information here, we agree that its not my fault if you break your Windows installation. No warranty and all that.
These notes are not meant to be a tutorial.
Comments
Comments in windows batch files start with REM. Some people use :: which is technically a label. Apparently using :: can result in faster script execution (See here and here). I’ve never checked.
REM This is a comment
:: This is a comment too...but different. Might be faster.
If statements
If "%foo%"=="bar" (
REM Do stuff
REM Do more stuff
)
else (
REM Do different stuff
)
Check for existence of file
if exist {insert file name here} (
    rem file exists
) else (
    rem file doesn't exist
)
Or on a single line (if only a single action needs to occur):
if exist {insert file name here} {action}
for example, the following opens notepad for autoexec.bat, if the file exists:
if exist c:\autoexec.bat notepad c:\autoexec.bat
Echoing and piping output
To get a newline in echoed output, chain commands together with &&
echo hello && echo world
gives
hello
world
To pipe output to a file use > or >> The construct 2>&1 ensures that you get both standard output and standard error in your file
REM > Clobbers log.txt, overwriting anything you already have in it
"C:\SomeProgram.exe" > C:\log.txt 2>&1

REM >> concatenates output of SomeProgram.exe to log.txt
"C:\SomeProgram.exe" >> C:\log.txt 2>&1
Environment Variables
set and setx
- set – sets variable immediately in the current context only. So, variable will be lost when you close cmd.exe.
- setx – sets variable permanently but won’t be valid until you start a new context (i.e. open a new cmd.exe)
List all environment variables defined in current session using the set command
set
To check if the environment variable FOO is defined
if defined FOO (
 echo "FOO is defined and is set to %FOO%"
)
To permanently set the system windows environment variable FOO, use setx /m
setx FOO /m "someValue"
To permanently unset the windows environment variable FOO, set it to an empty value
setx FOO ""
A reboot may be necessary. Strictly speaking this does not remove the variable since it will still be in the registry and will still be visible from Control Panel->System->Advanced System Settings->Environment variables. However, the variable will not be listed when you perform a set command and defined FOO will return false. To remove all trace of the variable, delete it from the registry.
Environment variables in the registry
On Windows 7:
- System environment variables are at HKEY_LOCAL_MACHINE\SYSTEM\CurrentControlSet\Control\Session Manager\Environment
- User environment variables are at HKEY_CURRENT_USER\Environment
If you change environment variables using the registry, you will need to reboot for them to take effect.
Pausing
This command will pause for 10 seconds
TIMEOUT /T 10
Killing an application
This command will kill the notepad.exe window with the title Readme.txt
taskkill /f /im notepad.exe /fi "WINDOWTITLE eq Readme.txt"
Time stamping
The variable %time% expands to the current time which leads you to do something like the following to create time stamps between the execution of commands.
echo %time%
timeout /t 1
echo %time%
This works fine unless your code is in a block (i.e. surrounded by brackets), as it might be if it is part of an if-statement for example:
(
echo %time%
timeout /t 1
echo %time%
)
If you do this, the echoed time will be identical in both cases because the %time% entries get parsed at the beginning of the code block. This is almost certainly not what you want.
Setlocal EnableDelayedExpansion
(
echo !time!
timeout /t 1
echo !time!
)
Now we get the type of behaviour we expect.
Where is this script?
Sometimes your script will need to know where it is. Say test.bat is at C:\Users\mike\Desktop\test.bat and contains the following
set whereAmI=%~dp0
When you run test.bat, the variable whereAmI will contain C:\Users\mike\Desktop\
Details on %dp0 can be found at StackOverflow.
Variable substrings
This came from StackOverflow’s Hidden features of Windows batch files which is a great resource. They’ve tightened up on what constitutes a ‘valid question’ these days and so great Q+A such as this won’t be appearing there in future.
> set str=0123456789
> echo %str:~0,5%
01234
> echo %str:~-5,5%
56789
> echo %str:~3,-3%
3456